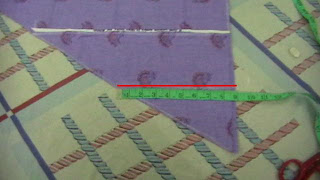
Here is part one of the simple leg belt shalwar tutorial. If you have any questions do leave a comment and I'll see what I can do to clarify.
To start you will need to figure out some measurements, if you have a shalwar that fits you then you can measure that. If you do not have a shalwar, then you need to do a bit of math. Measure from where you want your waist band to fall to just below your ankle. Take that number and subtract 7 for the belt, the remainder is your desired leg length. To the belt you need to add 2 inches of height, 1.5 for the drawstring casing and .5 for the seam attaching it to the legs, so the total height of the cutting for the belt is 9 inches. You also need to add 2 inches to your desired leg length, .5 for the seam and 1.5 inches for the hem at the foot. So for example if your measurement for the total height of your shalwar was 38, that would be a belt of 7 inches(9 cutting) and a leg of 31(33 cutting). For the width of the belt you measure your hips at their widest and then add at least 6 inches for ease (although you can add more if you like), plus 1 inch for seams. The width of the main leg pieces should be as wide as possible, as the shalwar is supposed to be loose and flow-y.


 Cut the smaller pieces.


After all your cutting you should have the following pieces-

Now take the inner leg pieces and match them to the main leg pieces with right sides facing and sew a half inch seam. Each of the two main leg pieces should now look like this-

Take the interfacing and center it on the wrong side of the cloth at the bottom foot opening one half inch up from the bottom.
Fold up the half inch of cloth and sew one line to hold the interfacing in place.
Now fold the interfacing up one inch. Sew at least one line at the top of the fold, and one line at the bottom, you can leave it like this, but usually more lines are added between, sometimes up to nine or ten parallel lines.

 Step 13
Match both of the leg pieces with right sides facing, and sew a half inch seam on one side of the extra pieces. This is the center front crotch seam.
 Step 14
Thread a hand sewing needle with at least 20 inches of thread, and knot the end. Find the center of each of the main leg pieces and mark.


Run a line of roughly half inch stitches from one mark to the other. The above diagram shows the main leg pieces and your line of stitches should go from point A to point B.
 Step 15
Draw your thread up so that the length is about 10 inches, and then make a knot to secure the gathers. You want the center part of the leg(points A and B) to line up roughly over your hips so that the center line runs straight down the front of your leg and the inner seam is at the back.
 Step 16
While pressing down on the gathered area, run a line of machine stitches across it to secure them in place. Do not allow the machine to push the gathered part to one side, It should stay even all the way across.
 You can now take out the line of hand stitching if you like.
 Step 17
Match the back of the leg pieces and sew a half inch seam. This is the center back crotch seam.
 End of Part one, for the rest please see part two of the tutorial.
If you see a mistake in this tutorial or need more explanations feel free to leave a comment and inshAllah, I'll get back to you as soon as possible.


